
Select the proper paint to your mission! Come discover ways to paint furnishings in latex, chalk paint, milk paint, spray paint, and oil-based paint.
Extra assist with furnishings portray: Methods to Refinish Wooden Furnishings (Stripping off previous Finishes) – Methods to Stop Tannin Bleed-Via – Methods to Stain Wooden Any Coloration with a Coloration Wash

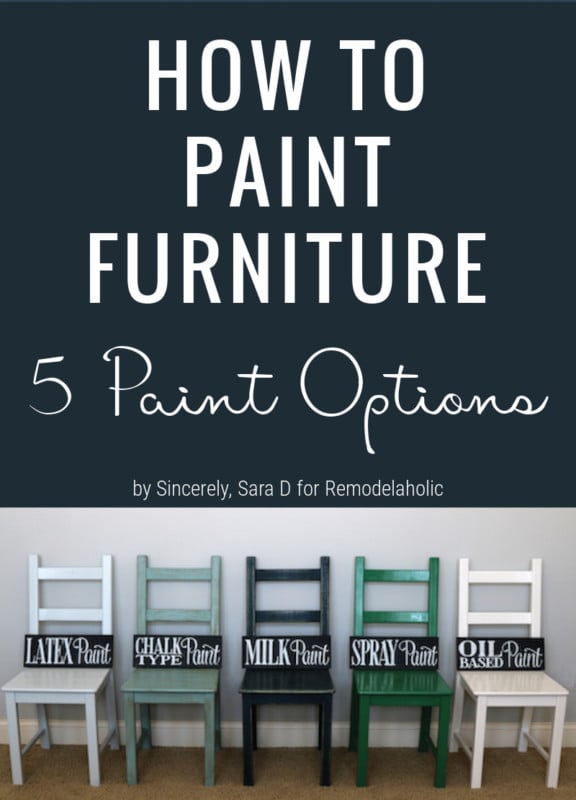
Methods to Paint Furnishings – 5 Choices for Paint
by Sara of Sincerely, Sara D.
I’m excited to be right here with you at this time on Remodelaholic. If you happen to comply with my weblog, you realize that I’ll paint (nearly) something.
In the present day I’m going to share suggestions for portray furnishings utilizing 5 several types of paint: latex, chalk, milk, spray and oil-based.
Earlier than you begin portray, learn our suggestions for prepping refinished furnishings to take away smells and get a bit prepared to color.
This submit comprises affiliate hyperlinks to your comfort. Be taught extra and skim our full disclosure coverage right here.

Methods to Paint Furnishings with Latex Paint
Latex paint (often known as water-based or acrylic paint) is nice as a result of it’s cheap and simple to wash up because it’s water-based.
Step 1: Sand
You will need to sand your furnishings piece to take away a number of the piece’s present end whereas making a floor the paint can adhere to.
Step 2: Clear
Give your piece a great cleansing. Use a moist rag to take away mud from sanding and another filth or grime. If wanted, wash down the piece and use a cleaner like Easy Inexperienced.
Step 3: Prime
Priming earlier than you paint with latex paint takes time, however will probably be properly price it to make sure that the latex paint received’t chip or peel.
Step 4: Paint
How the paint is utilized will decide the look of the paint. Use a foam curler for a smoother look. Use a high-quality brush for locations the curler received’t attain.

Step 5: Seal
Seal latex paint with a water-based polyurethane protecting end, equivalent to Polycrylic. It’s water-based (like latex), and it shouldn’t yellow over time.

Methods to Paint Furnishings with Chalk Paint
If you happen to have a look round my weblog, you’ll shortly understand I’m an enormous fan of any sort of chalk paint (or miracle paint as I lovingly name it).
Chalk paint doesn’t require stripping, sanding or priming! It adheres to nearly any floor, dries shortly and cleans up simply with cleaning soap and water. It even works on a rest room vainness like this or kitchen cupboards like these.
For additional information: Learn evaluations of Annie Sloan Chalk Paint and Cece Caldwell Paint, plus extra suggestions for utilizing chalk paint right here.
Step 1: Wash
To start, I normally simply wipe down a bit to take away any mud or filth. I personally have by no means used a primer with chalk-type paint, however I might counsel it if the piece has a very shiny end.
Step 2: Paint, at the very least 2 coats
Paint your complete piece with paint. I normally use a brush (however a small curler might are available in hand for some items equivalent to cupboards). You’ll discover that somewhat paint goes a great distance, and I nearly all the time use two coats of paint. Chalk-type paint dries actually quick, however be certain that the primary coat is dry earlier than making use of the second.

Step 3: Clear Wax, then Darkish, if desired
After the paint is totally dry, apply two coats of wax on the piece utilizing a wax brush. I don’t await the primary coat of wax to dry earlier than I apply the second coat. A tip when waxing, much less is extra!
Darkish Wax is optionally available. Use it if you wish to deliver out particulars and/or just like the aged look. You will need to apply clear wax BEFORE you apply darkish wax. Go straightforward on the darkish wax. You received’t want a lot! Apply the darkish wax with a brush over considerably dry clear wax. Take away extra wax with a lint-free fabric.
You aren’t restricted to utilizing wax,. For top-use, high-touch items equivalent to kitchen cupboards, desk tops, desk tops, flooring, and outside furnishings, I might suggest a water-based polyurethane protecting end equivalent to Polycrylic.
Step 4: Buff
Buff the wax utilizing a lint-free fabric. It’s fairly straightforward to see the place you missed the wax, so you’ll be able to simply contact these locations up with a brush or rubbing wax in together with your fabric. Buffing helps clean out and take away further wax.
Step 5: Sand
If desired, sand to offer the piece an aged, worn, imperfect look. I like to recommend sanding after you apply the wax due to the chalk nature of chalk-type paint. It should make a multitude in the event you sand earlier than waxing and you then danger mixing the paint particles into the wax. I normally sand the sides and locations the place regular put on and tear would happen.
And that’s it! That is by far my favourite paint to make use of on furnishings.
Chalk paint was the go-to for portray furnishings with out sanding. Now, there are a number of manufacturers of paint that provide the sanding free portray course of with out having to make use of furnishings wax to seal the matte end chalk paint. Learn Cassity’s expertise with the Past Paint model right here.

Methods to Paint Furnishings with Milk Paint
I’ve a love/hate relationship with milk paint.
I find it irresistible as a result of:
- it doesn’t require any prep work
- it has lovely dimension being constituted of pure pigments
- on uncooked wooden, it’s pretty, performing like a stain
- on uncooked wooden, it can soak in, which means nice sturdiness
I hate it as a result of:
- it tends to chip if used on a bit with an current end
- the outcomes on a bit with an current end may be unpredictable
- milk paint’s consistency makes it exhausting to manage
However all is just not misplaced! In case you are portray a bit with an current end, you’ll be able to add a bonding agent. A bonding agent is bought individually from chalk paint then added to the paint. Chipping can nonetheless happen with the bonding agent – however to not the identical extent as it could with out.
For extra info: See evaluations of The Actual Milk Paint Firm and Outdated Normal Milk Paint, additionally Layering Milk Paint to Create a Distressed End.
Step 1: Combine
Milk paint is available in powdered kind so requires mixing. It has an indefinite shelf life as a powder, nonetheless, as soon as blended the paint must be used pretty shortly. To combine, you add one half powder to at least one half paint. You possibly can add extra powder (or water) to get the consistency you favor. Permit the paint to sit down for a bit to permit the clumps to soak up water and assist the bubbles to go away. Remember the fact that you will want to sometimes combine the paint occasionally because the powder will settle on the backside.
Step 2: Paint
Milk Paint doesn’t require prep work earlier than you paint – no sanding or priming! Milk paint is skinny and drips fairly simply. Use fast strokes and keep on prime of the drips, wiping them as shortly as attainable. Look forward to every coat to dry earlier than including one other. I normally do 3 coats of milk paint.

Step 3: Sand
After you’re finished portray, you’ll be able to sand the piece. Sanding is nice if you wish to misery and clean out the end (you’ll discover some powder lumps). When you have plenty of chipping, you’ll need to clean out these areas.
Step 4: Apply a end: Wax, Oil, Polycrylic, and so forth
I take advantage of wax on my milk painted items then buff the wax utilizing a lint-free fabric. It’s fairly straightforward to see the place you missed with the wax, so you’ll be able to contact up these locations with the comb or fabric. Buffing helps clean out and take away further wax.
A water-based polyurethane protecting end equivalent to Polycrylic is greatest for high-use items equivalent to cupboards or desks. Oils are additionally an possibility. Hemp oil is a good as a result of it’s meals protected.

Methods to Paint Furnishings with Spray Paint
Spray paint is fast and simple. It affords protection with out brush strokes and an easy cleanup.
Additionally, since spray paint is often oil-based, it adheres properly to most surfaces. It dries quick and is sturdy.
Nonetheless, it will possibly get costly when you’ve got a big piece of furnishings and it wants hotter temperatures to work accurately.
Step 1: Prep your Furnishings Piece
Clear your furnishings piece properly and permit it to dry utterly.
Step 2: Prep your Work Space and Your self
Spray paint in a well-ventilated space. I take advantage of the storage with the door huge open.
Use a big fabric to guard the ground. Put on a paint masks.
Additionally, I counsel a twig paint attachment to maintain your arms clear and decrease muscle cramping.
Step 3: Prep the Paint Can
Shake your can for a number of minutes. The primary spray out of the can will typically splatter.
Goal the can away from the merchandise you’re portray, push down on the nozzle and begin spraying.
I typically “apply” on a bit of cardboard to get the splatters out and to find out how briskly or gradual I ought to transfer the can.
Step 4: First Coat
All the time begin spraying simply barely away out of your merchandise. Easily however pretty shortly transfer the paint stream to your merchandise, holding it about 8 inches away.
Transfer backwards and forwards in a clean fast movement, portray a gentle coat.
For multi-dimensional objects, use quick bursts of paint, all the time beginning away out of your merchandise and ending away out of your merchandise. It’s tempting to spray a heavy coat, however that may imply drips!
Step 3: Extra Coats
Proceed portray coats after the earlier coat has dried. (Verify the can for drying instances. Remember the lighter the coat, the faster the dry time.)
I sometimes spray paint a coat and go work on one thing else for some time. As soon as the coat has dried, you’ll be able to add one other. Do that till you have got full protection.

With spray portray, I not often use a prime coat except there’s a sure sheen I’m making an attempt to attain. A prime coat will add one other layer of sturdiness however typically spray paint holds up properly on it’s personal.

Methods to Paint Furnishings with Oil-Based mostly Paint
Oil-based paint may be very sturdy due to its exhausting shell. Its lovely shiny end adheres properly to most surfaces.
Oil-based paint requires a chemical clean-up since it’s not water-based and it takes a very long time to dry. I might plan on 24 hours per coat of paint. Due to this I normally discover myself choosing different paint varieties.
Step 1: Sand
Sanding earlier than portray helps the paint adhere higher.
Step 2: Clear
Give the piece a great cleansing. Use a moist rag to take away mud from sanding and another filth or grime. If wanted, wash down the piece and use a cleaner like Easy Inexperienced.
Step 3: Prime
With oil-based paint, you could use an oil-based primer. It should take extra time, however I all the time counsel priming. Will probably be properly price your time and power to have a bit that doesn’t chip or peel.
Step 4: Paint
How the paint is utilized will decide the look of the paint. Use a foam curler for a clean look and a brush for a extra rustic look.

Step 5: Seal
Seal oil-based paint with an oil-based end.
And there you have got it! 5 choices for paint and a easy learn how to of every!
Right here’s a helpful desk so that you can examine and distinction the totally different paint varieties when selecting learn how to paint furnishings:

Extra portray methods and suggestions:
Please pin this for future reference!
Initially printed 08.09.2017 // Up to date 03.30.2021